How to use italics like a pro

Blog, On editing

Command i. It’s so easy to use this keyboard shortcut, especially when you’re working with a text that contains many foreign-language words.  The general rule in publishing is to italicise foreign words in English text, but have you ever considered whether the word you’re setting in italics really needs to be italicised?

Take for example, this piece of text written especially for a Jewish audience before the important holy days of Rosh Hashanah and Yom Kippur.

So, as the Jewish New Year begins and the sound of the shofar is heard in shuls around the country, I want to wish you a sweet and prosperous year.

The words ‘shul’ and ‘shofar’ come from Hebrew and so it would be tempting to italicise them. BUT.

Here’s what the Chicago Manual of Style says in its foreign words section:

7.52 Roman for familiar words. Foreign words and phrases familiar to most readers and listed in Webster’s should appear in roman (not italics) if used in an English context; they should be spelled as in Webster’s.

Oxford’s recommendation as set out in its Oxford Guide to Style also says to:

“Take into account […] the intended reader’s expectations”.

So given that the words shul and shofar appear in the dictionary and that the Jewish audience reading the text would understand them, there is no reason to italicise them.

Two simple questions to ask yourself:

  1. Is the word in the English dictionary (as suggested by the client’s house style)?
  2. Would the average reader of this text be familiar with this word?

Sweet and simple.

So on that note, Shana Tovah to all my Jewish readers. Wishing you a sweet and prosperous New Year!


Written by Melissa Fagan, freelance content writer and editor

I help traditional and digital publishers deliver engaging and informative content that resonates with their readers. Internationally qualified writer and editor with 13 years’ publishing experience.

Email me: melissa.fagan@mfedit.com

Let’s Connect

If you liked this post and you’re passionate about publishing, let’s schedule a meeting to discuss the industry.

The editor’s guide to cheese

Blog, On editing

You read that correctly. This is indeed a post about cheese. I thought it would be useful to capture in one place the correct spellings of 10 of the cheeses most commonly used  in recipe books. Why? Because when editing a recipe book, it’s good to know exactly how each cheese is spelt and whether it takes a capital letter or not. Here’s my by no means definitive list:

Cheeses named by regions take a capital letter

1. Brie (from Brie, a region of northern France)

2. Cheddar (from the English village of Cheddar in Somerset)

3. Camembert (from Camembert, Normandy in northern France)

4. Gouda (named after the Dutch city of Gouda)

5. Gruyère (named after the town of Gruyères in Switzerland)

6. Parmagiano-Reggiano or Parmesan (from the provinces of Parma, Reggio Emilia and  Bologna in Italy.  Parmagiano-Reggiano refers to Parmesan produced in Italy. The generic term Parmesan is used for cheeses produced elsewhere which are similar in flavour and production method.)

Cheeses named for their ingredients or production method take lower case

1. feta (from the Greek word, meaning ‘slice’)

2. mascarpone cheese (thought to have got its name from mascarpa, a milk product which is made from the whey of stracchino or short aged cheese. )

3. mozzarella (from a Neapolitan dialect,  it is the diminutive form of mozza meaning to ‘cut’)

4. pecorino (an Italian cheese made from sheep’s milk; the word derives from the Italian pecora, which means sheep.)

It’s worth noting though, that the Guardian and Observer Style Guide suggests spelling all cheeses using lower case even if they’re named after a place.

As always, whatever you choose, make sure to be consistent throughout the text.


Written by Melissa Fagan, freelance non-fiction editor

I help non-fiction publishers deliver award-winning content using a creative and flawless approach to editing. Internationally qualified non-fiction editor with 11 years’ publishing experience.

Email me: melissa.fagan@mfedit.com


Let’s Connect

If you liked this post (or even if you found it cheesy) and you’re passionate about publishing, let’s schedule a meeting to discuss the industry.


How to create a style guide in 6 simple steps

Blog, On editing


Last week I wrote about the need for a style guide in order to maintain editorial consistency across a publication. This week, I’m sharing my tips for creating a simple style guide, especially when the publisher you’re working with doesn’t have an existing one to work from.

1. Pick your program

Choose a program in which to create your guide. You may want to use Microsoft Word, Google Docs, a Trello board or a simple spreadsheet. I like to use Google Docs, simply because it’s collaborative. I can share my style guide with anyone who needs it – the publisher themselves and particularly my proofreader.

2. Add your alphabet

Because I like to work in Google Docs, I create a table with each square representing a letter of the alphabet.  You can do this in Excel or even using Trello cards. The point is to make a repository for each letter so it’s easy to find what you’re looking for at a glance.

3. Start with the basics

I usually begin populating my style guide with the general rules (especially words and punctuation marks that are commonly spelled or used incorrectly). Under ‘D’ I might add ‘dashes’ and write up the conventions for using en dashes and em dashes. Under ‘S’ I might add ‘spelling’ and specify: British. It’s also important to clarify the kind of tone the publication uses.

4. Every word counts

And then I’m ready to crack on. If a word comes up while I’m reading the text that isn’t used in a consistent way, I make a decision on the correct usage and pop it into my style guide under the relevant letter. It’s often a case of whether the word takes upper or lower case or is written as two words, rather than one. And so it continues…

5. Check with the pros

When in doubt it’s always useful to check in with the latest published style guides. I like The Chicago Manual of StyleThe Guardian and Observer Style Guide and for academic texts, APA Style. And let’s not forget the good old dictionary, of course. Make sure to include which dictionary you’ve referenced somewhere in your style guide.

6. Keep going

If a style guide is not up-to-date, it’s no use to anyone. Keep adding as you go and remember to date your document so everyone knows they’re working with the latest version.


Written by Melissa Fagan, freelance content writer and editor

I help traditional and digital publishers deliver engaging and informative content that resonates with their readers. Internationally qualified writer and editor with 13 years’ publishing experience.

Email me: melissa.fagan@mfedit.com


If you liked this post (or even if you didn’t) and you’re passionate about publishing, let me treat you to a coffee so we can discuss the industry. Contact me at melissa.fagan@mfedit.com or 082 5002612


The secret to editorial consistency

Blog, On editing

Screen Shot 2017-08-30 at 10.28.33 PM.png

The secret to editorial consistency is no secret at all, it’s called an editorial style guide. Using a style guide is critical for those of you who are passionate about delivering award-winning content. The style guide will almost guarantee that your editor, copy-editor and even your proofreader will all deliver copy using the appropriate tone, punctuation, abbreviations and spelling for your publication.

More often than not I’m finding that publishers today don’t keep their style guide up-to-date and even worse, some publishers don’t have one at all. If your publishing house is after award-winning content, then working with a style guide is critical to your success.

A style guide clarifies things like:

  • whether your publication uses British or American English
  • how to spell commonly misspelt words
  • whether or not to use Oxford commas
  • how and when to abbreviate certain terms
  • when to captitalise words

And the list goes on.

Inconsistency is the single most distracting thing to a reader. Consistency ensures that your reader focusses on what you are saying, not on how it is being said. And it’s what makes your reader trust the credibility of your publication.

Every time I take on a new job, I either create my client’s style guide from scratch or update their existing one. If you need help creating a style guide, look out for my blog post next week.


Written by Melissa Fagan, freelance non-fiction editor

I help non-fiction publishers deliver award-winning content using a creative and flawless approach to editing. Internationally qualified non-fiction editor with 11 years’ publishing experience.

Email me: melissa.fagan@mfedit.com

If you need help creating an editorial style guide, let’s chat. Coffee’s on me. Contact me at melissa.fagan@mfedit.com or 082 5002612


The ugly truth: Copy-editing and proofreading are two different things

Blog, On editing


I’m always surprised at how many people think that copy-editing and proofreading are the same things. They are not, people! And if you don’t believe me, here are the facts:

Proofreading

Proofreading is the final stage of any publishing process. It’s the last quality check that happens after your text has gone into layout and before your content is printed or published online.

The proofreader’s job is to check (among other things):

  • that there are no typos, inconsistencies or grammar errors in the text. (Duh.)
  • but also that all the page numbers and page headings are where they should be
  • and that the illustrations and captions match up
  • that the same font type and size have been used throughout
  • and very importantly, that there are no missing punctuation marks or elements that may have crept in during the design phase – we’ve all seen them in printed copy before – a series of x’s indicating unfinished content that never found its way into the layout. Cringe.

In other words: They check EVERYTHING. Every page, every word, every image. Think of proofreading as a final spit and polish of your product before it goes out into the world.

Copy-editing

Copy-editing happens after you’ve written your text and before it’s been typeset – or for digital publishers –before it’s been added to the platform you will be using to share your product.

The job of the copy-editor is to (among other things):

  • bring the first draft of a manuscript up to scratch. (You may think it’s perfectly written. But, remember:  Everyone needs an editor.)
  • check grammar and spelling (Duh – it’s the job of any editorial role)
  • suggest edits to cut wordiness and repetition
  • (if necessary) suggest changes to chapter titles and sub-headings
  • reorganise certain sections so that the content flows in a more logical order
  • make sure that the writing conforms to the publisher’s style guide (more about that in another post)
  • and of course to check that any dates, names, places and facts mentioned are accurate

In short, the copy-editor’s job is to help make the content accurate and more readable before it goes into layout. If proofreading is the final spit and polish, think of copy-editing as the sanding down of a new sculpture to bring out its sheen before being treated.

Sadly in today’s world of immovable deadlines and compulsive cost-cutting, especially in publishing, these roles are often played by the same person. But make no mistake – they are two separate jobs. And both are necessary.


Written by Melissa Fagan, freelance non-fiction editor

I help non-fiction publishers deliver award-winning content using a creative and flawless approach to editing. Internationally qualified non-fiction editor with 11 years’ publishing experience.

Email me: melissa.fagan@mfedit.com


If you liked this post (or even if you didn’t) and you’re passionate about publishing, let me treat you to a coffee so we can discuss the industry. Contact me at melissa.fagan@mfedit.com or 082 5002612


Cookbook editing: 10 tasty tips

Blog, On editing

6361432673_a44e394fb7_z.jpg

When I was first asked to edit a cookbook, I jumped at the chance, despite never having done this type of editing work before. I figured it would add another string to my editor’s bow, and besides, with a family of four to feed – I’m always in need of culinary inspiration.

Through the process, not only did I learn that editing recipes is hungry work (and that working from home with unlimited access to my fridge wasn’t the best idea), but I also got an on-the-job lesson in how to make sure a recipe is clear, accurate and easy to follow.

Here are the top tips I learned along the way:

  1. The title of the recipe needs to be consistent wherever it’s used in the book – on the recipe page, in the index, in any cross references from other recipes. (The search function is your friend!)
  2. The little blurb about the recipe is called the headnote and can be used, among other things to explain unusual ingredients.
  3. A recipe’s ingredients should always be listed in the order they are used in the method – this helps readers to plan and work systematically.
  4. If the recipe calls for several items to be added simultaneously, they must be listed in volume order (greatest to least).
  5. Every item listed in the ingredients list should be accounted for in the recipe. As we all know – there’s nothing worse than reading a recipe that asks you to add an ingredient which wasn’t listed… how will you know how much of it you must add?
  6. Make sure the recipe is very clear about things like white or brown sugar, dried or fresh herbs, full cream or low-fat milk.
  7. Always say what heat to use – low heat, medium heat or high.
  8. Indicate what size and type of bowl, pan, pot, etc., the reader will need, especially if it matters to the preparation.
  9. Check the images supplied with the recipe to make sure there is no garnish in the picture that wasn’t mentioned in the recipe. The reader wants to be able to make the dish exactly as shown in the picture.
  10. And finally, use a style guide to ensure consistency across all your recipes – either one that has been provided by the publisher or create one as you go along.


Written by Melissa Fagan, freelance non-fiction editor

I help non-fiction publishers deliver award-winning content using a creative and flawless approach to editing. Internationally qualified non-fiction editor with 11 years’ publishing experience.

Email me: melissa.fagan@mfedit.com

If you liked this post (or even if you didn’t) and you’re passionate about publishing, let me treat you to a coffee so we can discuss the industry. Contact me at melissa.fagan@mfedit.com or 082 5002612


Editing: the difference between blah and brilliant

Blog, On editing

Screen Shot 2017-08-15 at 2.29.33 PM

The other day I was approached by someone who’s written a book and wants it published. ‘My book is finished,’ she said. ‘What should I do next?’ My advice? Get an editor. Everyone needs one. Even writers with a great command of grammar. Even those who have spent years doing research for their book. Even writers with a master’s in English or those who are also editors. Even me. Everyone.  

Writers –  this is not a judgement of your skill or a punt for my business. It’s a sincere suggestion.

And here’s why:

1. An editor will be the first critical reader of your text.

You need someone who will be honest about the merit of your manuscript. Someone who will help you polish those rough edges. Nobody’s perfect, and neither is your text.

2. An editor will check your text for consistency and accuracy.

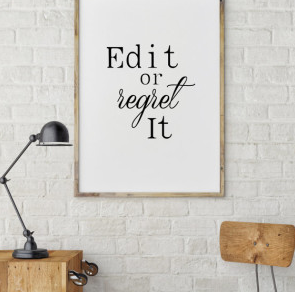
No reader will take you seriously if your book is filled with errors and inconsistencies.  Consistency, accuracy and flawless grammar are the cornerstones of a polished (and possibly award-winning) final product. Edit, or regret it.

3. An editor will help maintain the flow of your work. 

Editing is not just about fixing mistakes. It’s about maintaining the flow of your text. Flow is what keeps your reader turning the pages. And for this, you need someone to collaborate with you, to help you tell your story; not to change its original style, but to change what’s not working and to help you find clarity in the telling. A pause here, a full stop there – all these things will improve flow.

4. An editor will bring out the best in your writing.

Having an editor doesn’t make you a bad writer. In fact, the very best authors in the world all have editors. An editor’s job is to polish what’s already there, to highlight the best bits, to make it shine, to make it sing.

5. An editor will bring out the best in you.

Think of your editor as your coach – your faithful cornerman who will work hard to bring out your best work. They will ask challenging questions and will listen to understand so that your writing has meaning, integrity and clarity. Your success is their success. They truly want what’s best for you and will do whatever it takes to get you there.